
First Steps

What should you do after your blog is up and running?
After you fork Barry Clark’s Jekyll-Now site, it’s time to finish your site’s basic setup. This blog post is going to cover what you should do after you have followed the three main steps on the Jekyll-Now page.
First up – change your config.yml file settings
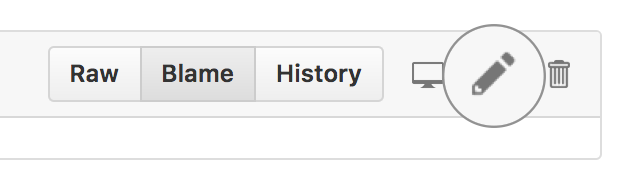
One of the first things you need to do is click on “config.yml” and then click on the little pencil icon to start editing your file.
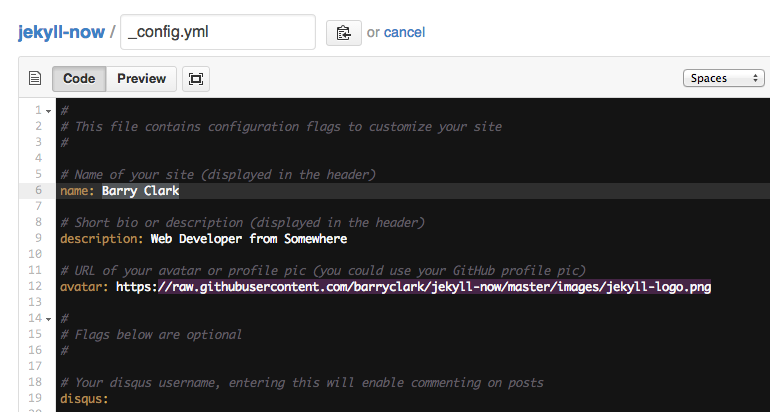
There are three things to do in your config.yml file (see the image below) – change Barry Clark’s name to your own (or to your blog’s name), change the description to something that will represent what your blog is about, and change your avatar. Changing your avatar is a little more complicated, so I’ll cover in more detail at the end of this post.
Next, add a new avatar
To add an avatar for your website, the image everyone will see at the top left of your webpage next to your title and description, start by finding a appropriate image using google. In this screenshot you can see that I went to images and then clicked on “Tools” to add more options.
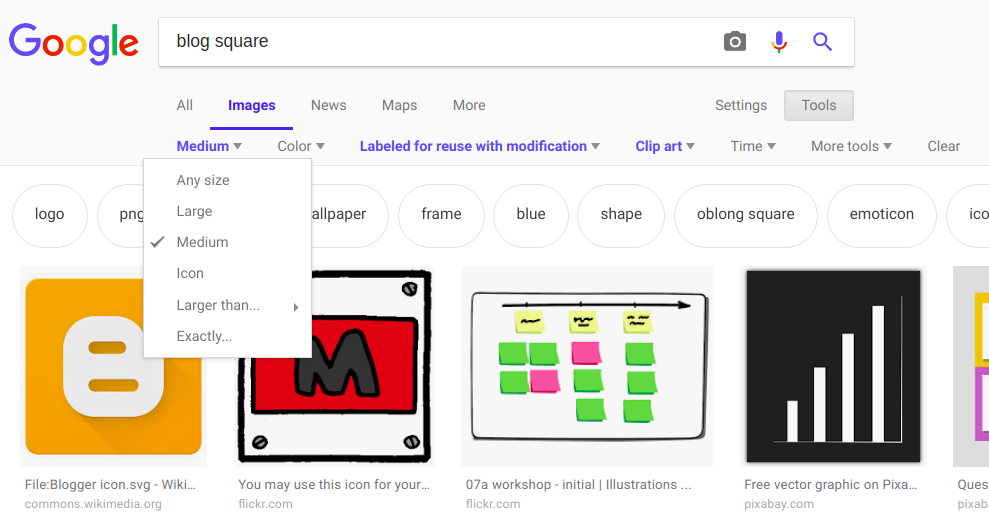
Finding the right image
Once there I picked size “medium” and “labeled for reuse with modifications” so that I wasn’t infringing on a copyright. Also, I added “square” to my search term so that the image I found would be square and would fit the space on the page better.
Right click on an image that you like and pick “save image as,” then change the title if needed to make it easier to remember after you upload it to your Github site. The image will be saved to your downloads folder if you’re working on your Chromebook.
Uploading your file to your image folder
Now that you have an image you want to use in the downloads folder of your computer, how do you upload it to Github? First, go to the main page of your repository and find your “Images” folder. Click on that and look for the button that says, “Upload files.” Click that, then click “choose your files.” Find your image in your downloads folder and click the button to upload it (the button might say “open,” “save” or “upload”).
Final steps
Remember the name of your new avatar in your images folder. Now head back to your config.yml file, click the pencil to start editing the file, and change the avatar’s website address to
"/images/NAME-OF-YOUR-IMAGE.png"
Note: Be careful to notice what kind of image you have on your computer – if it’s a PNG file, put “.png” at the end of your image name. If it’s a JPG file, use “.jpg”.
That’s it! Commit your changes, wait a few minutes, and then check your website address or refresh your page to see your new avatar.
Feeling Brave?
To learn more about Jekyll and some advanced techniques, check out the Jekyll Docs. Be careful, some of the instructions on this site don’t pertain to your files and folders, so following their instructions without knowing what you’re doing can break your website.